


2026 Review of AI 3D Printing and Modeling Tools
- info040709
- 1 day ago
- 8 min read
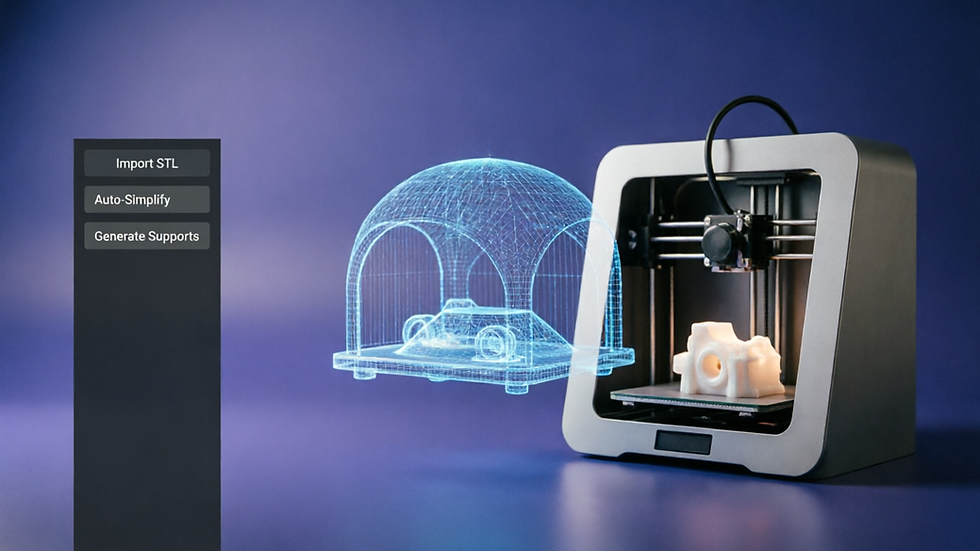
By 2026, AI 3D modeling has clearly split into three main routes: text-to-3D, image-to-3D, and scan reconstruction. Each route fits a different creative situation; choose the wrong direction and you may spend an afternoon producing a model that cannot be printed.
This review focuses on hands-on testing. Using the same brief, I tested Meshy, Tripo AI, Luma AI, Point-E, and Shap-E, compared how the three approaches perform in real 3D-printing scenarios, and mapped out a complete post-processing workflow from AI generation to slicing.
1. The Three Routes to AI 3D Modeling
Before choosing a tool, decide which route fits your project. The underlying logic and best use cases are different.
Route A: Text-to-3D
How it works:Enter a natural-language description and the AI interprets it to generate a 3D mesh.
Advantages:
Very low barrier to entry: if you can type, you can start modeling
Extremely fast for creative exploration, with a concept in about ten seconds
Useful for concept validation and rapid prototypes
Limitations:
Exact dimensions are difficult to control; a “5 cm tall cup” may be generated at any size
Complex mechanical structures such as gears, clips, and threads are usually weak
Several prompt iterations may be needed to approach the intended result
Best for:Artistic forms, game assets, decorative pieces, and creative gifts.
Recommended tools:Meshy and Tripo AI.
Route B: Image-to-3D
How it works:Upload one or more 2D images and let the AI infer depth and hidden surfaces to build a complete 3D model.
Advantages:
More controllable than pure text generation because it starts from an existing design
Useful for turning concept art and hand-drawn sketches into 3D quickly
Texture quality is often better because the original image provides a reference
Limitations:
The back and sides are inferred by AI and may not be accurate
Occluded areas may need manual repair
Input-image quality directly affects the output
Best for:Product visualization, character modeling, and converting existing 2D designs into 3D.
Recommended tools:Meshy, Tripo AI, and Luma AI Genie.
Route C: Scan Reconstruction
How it works:Use multi-angle photographs (photogrammetry) or NeRF technology to reconstruct a 3D model from a real object.
Advantages:
High-fidelity reproduction of real objects
Well suited to organic forms such as people, animals, plants, and sculptures
Useful for reverse engineering and personalized work
Limitations:
Usually requires 30 to 100 photographs
Processing takes longer, from several minutes to tens of minutes
Reflective, transparent, and completely black objects are difficult
The resulting model generally needs substantial cleanup
Best for:Digital preservation, body scanning, product reverse engineering, and personalized phone cases or portraits.
Recommended tools:Luma AI (NeRF) and Polycam (LiDAR).
2. Hands-on Comparison of Five Tools
I tested five tools with the same brief: “generate a 3D-printable desktop phone stand.”
Test setup
English prompt: A modern minimalist phone stand, ergonomic design, smooth curves, stable flat base, slot for charging cable, clean aesthetic, product design style, watertight for 3D printing
Image input: a hand-drawn side-view sketch of a phone stand
Export format: STL
Validation: check watertightness, normals, and wall thickness in Cura
Test results
Tool | Generation | Time | Model quality | Watertightness | Directly printable | Overall score |
Meshy | text + image | 25 seconds | model quality ★★★★★ | watertight pass | directly printable | 9.2/10 |
Tripo AI | text + image | 12 seconds | model quality ★★★★ | watertight pass | directly printable | 8.5/10 |
Luma AI | image + scan | 30 seconds | model quality ★★★ | needs repair | not directly printable | 7.0/10 |
Point-E | text | 90 seconds | model quality ★★ | failed | not directly printable | 4.5/10 |
Shap-E | text + image | 120 seconds | model quality ★★★ | needs repair | not directly printable | 5.5/10 |
Key findings
Meshy remains the first choice for 3D-printing users. Its STL output had the best watertightness and sensible topology, requiring almost no repair after import into Cura. Both text and image generation were consistently strong.
Tripo AI is the fastest, with good-enough quality. It produced a result in about 12 seconds and had solid model accuracy, although texture detail was slightly behind Meshy. Choose Tripo when efficiency matters most.
Luma AI is strongest at scanning, not general generation. Its generated phone stand was average, but its scan of a real object was very good. Route C is where it performs best.
Point-E and Shap-E are not ideal for 3D printing. They have strong academic value as open-source research projects, but their point clouds are sparse, surfaces are rough, and watertightness is weaker. They are not recommended for printing without substantial technical post-processing.
3. Detailed Comparison of the Three Approaches
The following eight dimensions highlight the differences between the three routes:
Dimension | Text-to-3D | Image-to-3D | Scan reconstruction |
Learning curve | Very low (typing is enough) | Low (uploading an image is enough) | Medium (shooting technique matters) |
Design speed | 10–30 seconds | 15–60 seconds | 5–30 minutes |
Control | Low, depends on AI interpretation | Medium, guided by a reference image | High, reproduces a real object |
Complexity support | Low, simple forms | Medium, moderate complexity | High, many real objects |
Printability | Medium, check watertightness | Medium–high, generally better quality | Low, extensive repair is common |
Texture quality | Medium, AI-generated | High, based on the reference image | High, captured from reality |
Cost | Free–$50/month | Free–$50/month | Free–$30/month |
Best tools | Meshy, Tripo AI | Meshy, Tripo AI | Luma AI, Polycam |
Which route should you choose?
Choose text-to-3D if you:
Have no existing design and want to explore from scratch
Need several concepts quickly
Do not require strict dimensional accuracy
Choose image-to-3D if you:
Already have concept art, a hand sketch, or a reference image
Need to convert a 2D design into 3D quickly
Care about texture quality
Choose scan reconstruction if you:
Need to reproduce an existing real object
Are creating personalized work such as portraits, pets, or body parts
Work in reverse engineering or digital preservation
4. From AI Generation to a Printable Model: A Complete Workflow
AI-generated models rarely print perfectly as-is. This tested workflow helps turn an AI output into a sliceable STL.
Step 1: Generate the model with AI
Using Meshy as an example:
Log in to meshy.ai and choose Text to 3D or Image to 3D
Enter a prompt; English is generally understood more accurately
Wait about 20–30 seconds for generation
Preview the model and inspect details at 360°
Click Export and download the STL
Prompt tips:Specify “watertight for 3D printing” and describe geometry such as flat base, smooth curves, and no thin parts. Avoid complicated mechanical structures such as gears, threads, and clips.
Step 2: Check watertightness
Import the model into Blender and use the 3D Print Toolbox:
Install it through Edit → Preferences → Add-ons → search for 3D Print
Press N to open the sidebar and select the 3D-Print tab
Click Check All and confirm that Non Manifold Edges and Intersecting Faces are both zero
Keep Thin Walls preferably above 0.8 mm, and note the Overhang angle before deciding whether to add supports
Step 3: Fix common problems
Problem A: Non-Manifold Edges. The model has holes or unclosed internal geometry. In Edit Mode, select Non Manifold, then use Mesh → Clean Up → Merge by Distance. If holes remain, select the boundary and press F to fill the face.
Problem B: Inverted Normals. Select all faces and use Mesh → Normals → Recalculate Outside (Shift+N), then check again in 3D Print Toolbox.
Problem C: Thin Walls. Some AI-generated structures may be thinner than the print nozzle diameter, usually below 0.4 mm. Delete the thin faces or use a Solidify modifier to thicken them.
Step 4: Adjust size and orientation
Set real dimensions in Blender through Object → Dimensions
Orient the model so its largest face is down to reduce supports
Export the repaired STL
Step 5: Import into a slicer
Open Cura, PrusaSlicer, or Bambu Studio and import the STL
Check watertightness once more
Layer height: 0.2 mm for standard quality
Infill: about 15–20% for decorative parts and 30–50% for functional parts
Add supports according to the overhang angle; over 45° is generally a good starting point
Slice and export the G-code
5. AI Modeling vs Traditional CAD: Complementary, Not Replacement
Will AI modeling replace Fusion 360 or SolidWorks? No. They are different routes for different problems.
Dimension | AI modeling | Traditional CAD |
Learning curve | Very low, measured in minutes | High, measured in weeks |
Design speed | Seconds | Hours |
Control | Low, AI estimation | High, precise parametric control |
Complexity | Low, simple forms | High, complex assemblies |
Editability | Low, often requires regeneration | High, traceable parameters |
Engineering accuracy | Low, about ±1 mm | High, about ±0.01 mm |
Best use | Concept design and art | Engineering design and functional parts |
Cost | Free–$50/month | Free–$2,000+/month |
When should you use AI?
Rapid prototypes: validate an idea within ten minutes
Creative exploration: generate multiple concepts
Artistic forms: organic shapes, decorative pieces, and character models
Beginners with no modeling experience
When should you use CAD?
Precision parts requiring accuracy to 0.1 mm
Complex assemblies where multiple parts must work together
Projects requiring repeated, parametric size changes
Engineering applications involving loads and fit tolerances
Best practice: an AI + CAD workflow
Use AI to generate a concept model (about 5 minutes)
Bring it into CAD for precise adjustment (about 30 minutes), including exact dimensions, threads, clips, interference checks, and assembly checks
Export the STL, slice it, and print
This combined workflow can save about 70% of modeling time while maintaining engineering accuracy.
6. A Decision Tree for Choosing a Tool
If you are still unsure, work through these questions:
Question 1: Do you have an existing design or reference image?Yes: choose Route B, image-to-3D. No: continue to Question 2.
Question 2: Do you need to reproduce a real object?Yes: choose Route C, scan reconstruction. No: choose Route A, text-to-3D.
Question 3: How much accuracy do you need?High, for engineering: use CAD rather than AI. Medium, for decoration or display: choose Meshy. Low, for rapid prototypes: choose Tripo AI.
Question 4: What is your budget?Free: Point-E or Shap-E, if you have the technical skills. Under $20/month: Tripo AI. $20–50/month: Meshy. Enterprise: Kaedim or Rodin.
7. AI 3D Modeling Trends in 2026
1. Multimodal input becomes standard
AI tools will move beyond a single input type. Users will be able to combine text, reference images, and sketches so the AI can generate a more accurate model; Meshy and Tripo AI are already moving in this direction.
2. Deeper CAD integration
AI-generated models are moving directly into Fusion 360 or SolidWorks, where they can be converted into parametric features. This is already being explored in real tools.
3. Continued improvement in generation quality
By 2027, AI-generated models may reach engineering-level accuracy of about ±0.1 mm, further blurring the line between AI modeling and traditional CAD.
4. Local deployment becomes practical
As open-source models such as Point-E, Shap-E, and TRELLIS 2.0 develop, users may be able to run AI 3D generation locally without sending data online.
Conclusion
In 2026, AI 3D modeling is no longer just a toy; it is a real productivity tool. The key is to choose the right route:
Text-to-3D: the lowest barrier for creative exploration
Image-to-3D: a controllable way to turn 2D designs into 3D
Scan reconstruction: the best option for reproducing real objects
For 3D-printing users, Meshy remains one of the strongest all-round choices: its models are generally watertight, need less post-processing, and can move into slicing more quickly.
AI will not replace traditional modeling, but it will lower the barrier to 3D creation more than ever. Start experimenting with your first printable AI-generated model and explore what 3D printing can make possible.
Updated August 2026. Tool information is based on hands-on testing and the latest official data available at the time of writing. Prices and features may change; check each tool’s official website for the latest information.
Related Products and Services
If you want to turn an AI concept into a real printed object, these two Beets offerings can help you move from equipment selection and beginner operation to practical printing:


Comments