


2026 Review of AI 3D Printing and Modeling Tools
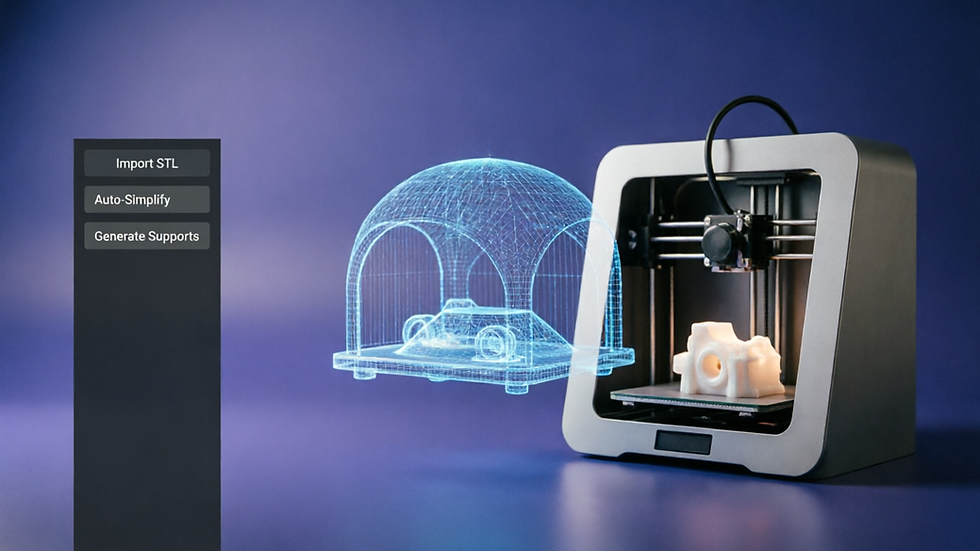
By 2026, AI 3D modeling had gradually diverged into three main paths: text generation, image-to-3D conversion, and scan reconstruction. Each path is suitable for different creative scenarios; choosing the wrong direction could mean spending an afternoon only to end up with a model that cannot be printed.
This article focuses on practical testing. I tested Meshy, Tripo AI, Luma AI, Point-E, and Shap-E with the same set of requirements, compared the actual performance of the three generation methods in 3D printing scenarios, and summarized the complete post-processing workflow from AI-generated models to sliced printing.
I. Three Approaches to AI 3D Modeling
Before choosing a tool, first determine which path you want to take. The three methods have different underlying logics and are applicable to significantly different scenarios.
Route A: 3D Text Generation
Principle: Input natural language description, and AI will generate corresponding 3D mesh after understanding the meaning.
advantage:
The entry barrier is low; anyone who knows how to input text can start modeling.
Creative exploration is highly efficient, generating a solution in about ten seconds.
Suitable for proof of concept and rapid prototyping
limit:
It's difficult to control precise dimensions; for example, even if you specify "a cup with a height of 5 centimeters", the AI may still generate any size.
The manufacturing quality of complex mechanical structures such as gears, clips, and threads is relatively weak.
It usually takes multiple revisions of the prompts to get close to the expected result.
Suitable for: artistic creations, game props, decorative items, and creative gifts.
Recommended tools: Meshy, Tripo AI.
Route B: Image to 3D
Principle: Upload one or more 2D images, and AI infers depth data and back structure to generate a complete 3D model.
advantage:
Based on existing designs, controllability is generally higher than that of plain text generation.
Suitable for quickly converting concept art and hand-drawn sketches into 3D.
Because there is an original image for reference, the texture quality is usually better.
limit:
The back and sides are predicted by AI, and the results may not be accurate.
The obscured parts may require manual repair.
The quality of the input image directly affects the output result.
Suitable for users who: visualize products, model characters, and convert existing 2D designs to 3D.
Recommended tools: Meshy, Tripo AI, Luma AI, Genie.
Route C: Scan Reconstruction
Principle: Reconstruct 3D models from real objects using multi-angle photographs (photogrammetry) or NeRF technology.
advantage:
It can replicate real objects with high fidelity.
Suitable for organic forms such as human body, animals, plants and sculptures
It can be used for reverse engineering and personalized customization.
limit:
Typically, 30 to 100 photos need to be taken.
The processing time is relatively long, ranging from several minutes to tens of minutes.
The effect is worse for reflective, transparent, and pure black objects.
Generative models generally require more cleanup work.
Suitable for: digitizing cultural relics, scanning human bodies, reverse engineering products, and creating personalized phone cases or portraits.
Recommended tools: Luma AI (NeRF), Polycam (LiDAR).
II. Comparison of Five Tools in Actual Testing
I tested five tools with the same testing requirement—"generate a 3D printable desktop phone stand".
Test environment
English prompt words: A modern minimalist phone stand, ergonomic design, smooth curves, stable flat base, slot for charging cable, clean aesthetic, product design style, watertight for 3D printing
Image input: A hand-drawn sketch of a phone stand from the side.
Output format: STL
Verification criteria: Check water tightness, normal direction, and wall thickness using Cura.
Test results
tool | Generation method | Time | Model quality | Water tightness | Can be printed directly | Overall rating |
Meshy | Text + Image | 25 seconds | Model quality ★★★★★ | Water tightness passed | Can be printed directly | 9.2/10 |
Tripo AI | Text + Image | 12 seconds | Model quality ★★★★ | Water tightness passed | Can be printed directly | 8.5/10 |
Luma AI | Image + Scan | 30 seconds | Model quality ★★★ | Needs repair | Cannot be printed directly | 7.0/10 |
Point-E | Word | 90 seconds | Model quality ★★ | Not approved | Cannot be printed directly | 4.5/10 |
Shap-E | Text + Image | 120 seconds | Model quality ★★★ | Needs repair | Cannot be printed directly | 5.5/10 |
Key Discovery
Meshy remains the top choice for 3D printing users. Its output STL has the best watertightness, reasonable topology, and requires almost no repair after being imported into Cura; the quality of text and image generation is also quite stable.
Tripo AI is the fastest and offers sufficient quality. It outputs results in about 12 seconds, and while the model accuracy is good, the texture detail is slightly inferior to Meshy. If efficiency is your top priority, Tripo AI is the more suitable choice.
Luma AI excels at scanning, not general generation. Its generated phone holders are mediocre, but they work very well for scanning real-world objects; Route C is where it truly shines.
Point-E and Shap-E are not well-suited for 3D printing. While they have academic value as open-source research projects, the resulting model has a sparser point cloud, a rougher surface, and weaker watertightness. Unless you have strong post-processing capabilities, it is not recommended to use them directly for printing.
III. Detailed Comparison of the Three Methods
The differences between the three approaches are summarized in eight dimensions below:
Comparison Dimensions | 3D Text Generation | Image to 3D | Scan Reconstruction |
Learning threshold | Extremely low (sufficient knowledge of text input) | Low (simply need to know how to upload pictures) | (Needs to learn shooting techniques) |
Design speed | 10 to 30 seconds | 15 to 60 seconds | 5 to 30 minutes |
Precision control | Low, depending on AI understanding | The original image is available for reference. | High quality, directly reproducing real objects. |
Complexity support | Low profile, suitable for simple designs | Medium complexity | High performance, capable of handling various real-world objects. |
Printability | In the middle, it is necessary to check the water tightness. | Medium to high quality models are of good quality. | Low, usually requires extensive repairs |
Texture quality | In China, AI generates textures. | High, based on the original image. | High quality, derived from real objects |
cost | Free up to $50 per month | Free up to $50 per month | Free up to $30 per month |
Best tools | Meshy, Tripo AI | Meshy, Tripo AI | Luma AI, Polycam |
Selection Suggestions
Select text generation. If you:
Without a ready-made design, I want to explore creativity from scratch.
Multiple solutions need to be generated quickly for comparison.
There are no strict requirements for precise dimensions.
Select image to generate, if you:
Concept art, hand-drawn sketches, or reference images are already available.
Need to quickly convert 2D designs to 3D
High requirements for texture quality
Select scan reconstruction if you:
Need to replicate real-world objects
Personalized customization is available, such as for portraits, pets, or body parts.
Reverse engineering or digitization of cultural relics
IV. Practical Application: The Complete Process from AI-Generated to Printable Models
AI-generated models are rarely printable directly. Here is a proven post-production workflow to help you convert AI output into sliceable STL files.
Step 1: Generating a model using AI
Take Meshy as an example:
Log in to meshy.ai and select Text to 3D or Image to 3D.
Input prompts; generally speaking, the accuracy of understanding English is higher.
The model will be generated in approximately 20 to 30 seconds.
Preview the model and check the details in 360°
Click Export and select STL format to download.
Tips: Clearly specify "watertight for 3D printing" and describe geometric features such as flat base, smooth curves, and no thin parts; avoid requesting complex mechanical structures such as gears, threads, and clips.
Step 2: Check water tightness
Import the model into Blender and check it using the 3D Print Toolbox:
Install the plugin: Edit → Preferences → Add-ons → Search for 3D Print
Press the N key to open the sidebar, then select 3D-Print pagination.
Click Check All to confirm that both Non Manifold Edges and Intersecting Faces are 0.
Thin Walls recommends a thickness greater than 0.8 mm; record the overhang angle to determine whether support is needed during slicing.
Step 3: Fix common problems
Problem A: Non-Manifold Edges. This is usually caused by holes in the model or an unsealed internal structure. You can select Non-Manifold in edit mode, then use Mesh → Clean Up → Merge by Distance; if holes still exist, select the edges and press F to fill them.
Problem B: Inverted Normals. Select all faces, use Mesh → Normals → Recalculate Outside (Shift+N), and then re-check in the 3D Print Toolbox.
Problem C: Thin Walls. AI-generated sections of the structure may be thinner than the print nozzle diameter (typically less than 0.4 mm). Thin walls can be deleted or thickened using the Solidify modifier.
Step 4: Adjust size and orientation
In Blender, set the actual size in Object → Dimensions.
Adjust the model's orientation so that the largest plane faces downwards to reduce support.
Export the repaired STL
Step 5: Import the slicing software
Import STL into Cura, PrusaSlicer, or Bambu Studio
Check water tightness again
Set floor height: 0.2 mm is available for standard quality.
Fill setting: Decorative parts approximately 15-20%, functional parts approximately 30-50%.
Whether or not to add support depends on the suspension angle; it is generally recommended to add support if the angle exceeds 45°.
Slice and output G-code
V. AI Modeling and Traditional CAD: Not Replacement, But Complementarity
Will AI modeling replace Fusion 360 or SolidWorks? The answer is no. They are two different approaches, solving different problems.
Comparison Dimensions | AI modeling | Traditional CAD |
Learning curve | Extremely low, measured in minutes | High, in weeks |
Design speed | Generating in seconds | Small-scale modeling |
Precision control | Low, relying on AI prediction | High, parametric and precise |
Complexity support | Low profile, suitable for simple designs | High, suitable for complex assembly |
Editability | Low efficiency, often requiring regeneration when making modifications. | High-performance parametric design with traceability |
Engineering precision | Low, approximately ±1 mm | Height, approximately ±0.01 mm |
Applicable Scenarios | Conceptual design and artistic creation | Engineering design and functional components |
cost | Free up to $50 per month | Free up to $2,000 or more per month |
When to use AI?
Rapid prototyping: Validating ideas in ten minutes
Creative Exploration: Generating Multiple Solutions for Comparison
Artistic Designs: Organic Forms, Decorations, and Character Models
Beginners with no modeling experience
When to use CAD?
Precision parts: functional components requiring precision down to 0.1 millimeters
Complex assembly: Multiple parts need to work together
Repeated modifications are required: Dimensions need to be adjusted in real time using parametric design.
Engineering applications: Requires load-bearing capacity and compliance with fit tolerances.
Best Practices: AI + CAD Combined Workflow
Generate conceptual models quickly using AI (approximately 5 minutes)
Importing into CAD software for precise adjustments (approximately 30 minutes) includes adjusting dimensions, adding engineering features such as threads and clips, and checking interference and assembly.
Export STL, slice and print
This combined workflow can save approximately 70% of modeling time while maintaining engineering accuracy.
VI. Tool Selection Decision Tree
If you are still having trouble deciding, you can assess the following in order:
Question 1: Do you have a ready-made design drawing or reference image? Yes: Select route B (generate 3D from image); No: Proceed to Question 2.
Question 2: Do you need to replicate the real object? Yes: Select route C (scan and reconstruct); No: Select route A (generate 3D text).
Question 3: Do you have high requirements for model accuracy? High (Engineering use): Use CAD, do not use AI directly; Medium (Decoration or display): Choose Meshy; Low (Rapid prototyping): Choose Tripo AI.
Question 4: What is your budget? Free: Point-E or Shap-E, but technical skills are required; Less than $20 per month: Tripo AI; $20 to $50 per month: Meshy; Enterprise-grade: Kaedim or Rodin.
VII. Trends in AI 3D Modeling in 2026
1. Multimodal input becomes the standard
AI tools will no longer be limited to a single input method. Users can provide text descriptions, reference images, and sketches simultaneously, allowing AI to generate more accurate models after comprehensive understanding; Meshy and Tripo AI are already moving in this direction.
2. Deep integration with CAD software
The idea of directly importing AI-generated models into Fusion 360 or SolidWorks and automatically converting them into parametric features is no longer just a concept.
3. Continuous improvement in production quality
It is projected that by 2027, AI-generated models will have the potential to achieve engineering-grade accuracy (±0.1 mm), further blurring the lines between AI modeling and traditional CAD.
4. Local deployment is gradually becoming more widespread.
With the development of open-source models such as Point-E, Shap-E, and TRELLIS 2.0, users may be able to run AI 3D generation tools directly on their computers in the future without needing to connect to the network, and their data privacy will be better protected.
Summary
By 2026, AI 3D modeling will no longer be just a toy, but a real productivity tool. However, choosing the right path is more important than choosing the right tool:
Text generation: Ideal for creative exploration, with the lowest barrier to entry.
Image generation: Suitable for converting 2D designs to 3D, offering greater controllability.
Scan Reconstruction: Suitable for replicating real objects, offering the highest degree of accuracy.
For 3D printing users, Meshy remains one of the best-performing tools overall: it generates models with good water tightness, requires less post-processing, and allows for faster slicing.
AI will not replace traditional modeling, but it will lower the barrier to 3D modeling to an unprecedented level. You can start experimenting now, using AI to generate your first printable model and explore the broader creative possibilities of 3D printing.
This article was updated in August 2026; tool information is compiled based on actual testing and the latest official data. Pricing and features may change over time; please refer to the official websites of the respective tools for the most up-to-date information.
Related products and services
If you want to truly transform AI concepts into printable works, the following two Beets services can help you get started step by step, from equipment selection and basic operation to actual printing:


Comments